Edamame & Kale Quiche

When you mention quiche, most people probably think brunch or tea party. Personally, I like to eat quiche any time of day. Breakfast? Of course. Lunch? Yum. Dinner? You got it. Snack? Bring it on! It’s also great for picnics and potlucks. You can even cut it into bite-sized pieces and serve as an appetizer. Is there anything a quiche can’t do? I think not!

Technically you should blind bake the dough partially, but oops! I forgot when I was doing my video. I was going to remake it and redo the video, but when I baked it, it was still pretty great! The egg part wasn’t overcooked even after letting the dough get nice and brown.

I still say for a perfect quiche – like if you were entering into a quiche-making contest or something – blind bake the dough partially. But I’ll leave it up to you. I wonder what I will do next time I bake one…

Serves 4-6          Difficulty Level: Intermediate

Ingredients:

  • 1.5 cups edamame
  • 1.5 cups kale, chopped and blanched (Click here to see a video on how to blanch)
  • 2 Tablespoons fresh tarragon, roughly chopped
  • 4 eggs
  • 2 cups half & half
  • ½ teaspoon sea salt for vegetable mixture, 1 teaspoon for egg mixture
  • ¼ teaspoon fresh ground black pepper for each mixture
  • 8 ounces goat cheese
  • 1 pie dough for 9” pie, homemade or store bought
  • sour cream or yogurt for garnish – optional

Instructions:

Preheat oven to 350°. Cook the edamame until it’s soft, but still has some texture or is al dente.

Blanch the chopped kale until bright green, about 30-40 seconds. Drain and Mix with the edamade and tarragon in a small bowl. Season with salt and pepper.

In a medium bowl, whisk the eggs with the half & half. Mix in the goat cheese, until combined but not complete incorporated. Leave some chunky pieces. Season with salt and pepper.

Roll out the pie dough to fit your pie dish. Make sure it’s large enough to come up the sides as well. Spread the edamame mixture evenly at the bottom of the dough. Then gently pour the egg mixture on top.

Bake until the crust is golden brown and the center is only slightly giggly, about one hour to one hour and 15 minutes.

Let cool for at least 15 minutes before cutting. You can serve it warm, at room temperature, or even cold. I wouldn’t necessarily plan to serve it cold, but if you came home from work late and are starving, you can grab a piece right out of the fridge and devour.

IMG_0658

Variations:

  • Skip the dough and make it a frittata. You don’t need to bake it as long, about 30-40, but still look for the slightly giggly texture in the middle. Let it cool down for the same amount of time, 15 minutes.
  • Use any combination of vegetables you like. Just stay away from things like tomatoes. It might make it too soggy. Unless you seed the tomatoes. (Click here for a video on how to peel and seed tomatoes.
  • If you are not concerned about keeping it vegetarian, add some cooked chicken, bacon, or sautéed pancetta. Yum!
  • Use different herbs like parsley, thyme, or chives or a combination.
  • For a little crunch and extra added fiber, protein, and magnesium, when your quiche (or frittata) is halfway cooked, sprinkle some pumpkin seeds on top.
  • Use other kinds of cheese like Gruyere, Brie, Parmigiano Reggiano, feta, Gouda, or Havarti.
  • Cut into bite-sized pieces and serve as an appetizer.

IMG_0681

 Do Ahead:

  • The fully cooked quiche can be kept in the refrigerator for up to 5 days.
  • If making the dough yourself, you can keep it in the refrigerator for up to 5 days, or freeze for up to 3 months.
  • The vegetables can be cooked/blanched up to 3 days ahead.
  • The egg mixture, along with the vegetables, can be made a day ahead.

Turkey Bolognese


This is an old video from 2009!

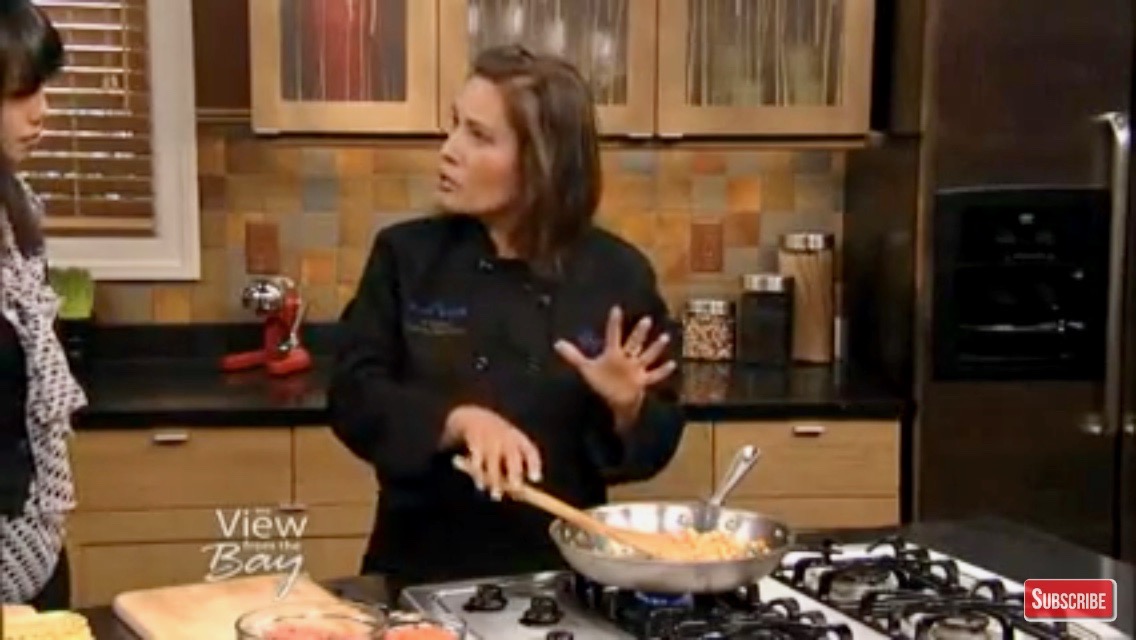
Does anyone remember this show? Unfortunately, it’s not on anymore, but it was a local weekday variety show on ABC called The View From the Bay, hosted by Spencer Christian and Janelle Wang. It was a live show that featured Bay Area attractions and interviews and also had a cooking segment every day. I had the pleasure of doing the cooking segments a total of five times!

VFTB 2

Did I mention it was live? Yikes!

VFTB 3

This one was about putting a twist on a recipe that a viewer had submitted. Her recipe was Turkey Bolognese. I wanted to keep the integrity of her recipe and didn’t want to change it too much. So my twist was adding some pesto sauce and making it into lasagna rolls instead of a traditional layered lasagna.

The recipe is in the video. Leave a comment if you have any questions or if you want more detail. It’s been 9 years so I may need to make a couple of adjustments. Please also see below for Variations and Do Ahead.

I had so much fun doing this show. I hope you enjoy watching it.

VFTB 4

Variations:

  • You can make the sauce the traditional way with a combination of ground beed and pork for a more robust flavor.
  • Use the sauce for regular spaghetti or any shape noodle you like.
  • Make a layered lasagna.
  • Add some grilled and chopped zucchini or eggplant to the sauce. If making a layered lasagna, I recommend keeping the vegetables in slices (not chopped) and layer with the sauce, cheese, and noodles.

Do Ahead:

  • Make the sauce and keep in the refrigerator for 5 days.
  • The sauce also freezes well. Make a double batch and freeze for that rainy day – literally – for the day that is pouring rain and you don’t feel like stopping at the store.
  • The rolls or the layered lasagna can stay in the refrigerator for about 3-4 days. When ready to eat, just add some cheese on top and bake in the oven as normal.


“Angry Shrimp” – Spicy Shrimp in Tomato Sauce Over Polenta

My friend Tracey had this dish at a restaurant and loved it. I don’t blame her. It is pretty delish. So I created this recipe based on her description of the meal.

The video is us genuinely trying the recipe without practicing or rehearsing. We are figuring it out as we go. Obviously I had some idea of where to start based on Tracey’s description. My point, I tested the dish again and honed it some more after the video. So the list of ingredients below is more complete and has a couple of ingredients that I did not use on the video.

Don’t forget to scroll down for ideas on Variations and Do Ahead tips. I am also including links for some of the products I used for you to purchase through Amazon with just a click.

Serves 4          Difficulty Level – easy-intermediate

Ingredients:

  • 2 cups cooked polenta
  • 2 tablespoons olive oil
  • 1 pound medium or large shrimp with tail on, seasoned with salt
  • 1 small shallot, chopped finely, about 3 tablespoons
  • 2 garlic cloves, finely chopped
  • 1 teaspoon, or to taste, red pepper flakes
  • 2 teaspoons smoked paprika (not in the video)
  • 1 cup chopped tomatoes, either fresh, canned, or boxed. I used Pomi brand chopped tomatoes
  • ½ cup white wine
  • ½ cup chicken stock
  • ¼ cup parsley, roughly chopped
  • 1 ½ tablespoon of butter, cut into chunks
  • sea salt and freshly ground pepper to taste
  • squeeze of lemon (optional) (not in the video)

Heat a sauté pan on medium-high heat. Add the olive oil and give it about 30 seconds to heat up. Once hot, add the shrimp. Sauté until they turn pink, about 1-2 minutes. Do not overcook them! Take them out of the pan and set aside.

IMG_7219

In the same pan, sauté the shallot and garlic until soft, about 1 minute. Add the red pepper flakes and smoked paprika. Stir to combine. I did not use smoked paprika in the video. It was an afterthought, but it definitely adds another dimension of flavor to the dish.

IMG_7221

Add the chopped tomatoes, wine, and stock. Deglaze the pan and let the sauce reduce and thicken, about 5 minutes.

Add the shrimp back to the pan and heat through, about 1 minute. Add the butter chuncks one piece at a time and whisk to combine. Turn off the heat and add the chopped parsley and squeeze of lemon, if using.

Serve hot over polenta.

The difference between coarse and fine ground polenta.

IMG_7217

Variations:

  • If you don’t like spicy, you can completely omit the pepper flakes or use less.
  • You can substitute more wine for chicken stock.
  • Substitute shrimp for chicken, sausage, or a combination. Kind of like a jambalaya without the rice.
  • OMG! How about mussels or clams or both! Include the shrimp and you have 3 angry shellfish!
  • Make it lighter by not adding the butter at the end when finishing the sauce.
  • Make it lighter by adding chicken stock to the polenta to make it a creamy texture instead of butter and milk.
  • If calories are not your concern, you can add a few tablespoons of half and half or heavy cream to the sauce. It will give it a creamy texture and cut back the heat a little from the red pepper flakes. If using this option, no need to use butter at the end.
  • Serve as a pasta sauce, or serve with mashed potatoes, rice, or baguette.

Do Ahead:

  • The sauce without the shrimp can be made up to 3 days in advance. But save whisking in the butter until you want to use it. When ready to serve, heat the sauce on the stovetop on medium heat. Meanwhile, sauté the shrimp separately and add to the sauce when ready to serve. Whisk in the butter, one piece at a time.
  • The polenta can be made up to 3 days in advance. You can reheat on the stove or in the microwave. I don’t mention using a microwave often, but starches like pasta, rice, mashed potatoes, polenta, etc. heat up nicely in the microwave. Whether on the stovetop or microwave, you want to add some liquid, like water, chicken or vegetable stock, or milk when reheating.

Caesar Salad In a Glass – No Forks Needed!


Makes 1 cup of dressing          Difficulty Level: Easy +

Dressing

  • ½ teaspoon anchovy paste – can be found at grocery stores, usually in the canned tuna isle
  • 1 clove of garlic, minced
  • 1 teaspoon sea salt
  • ½ teaspoon freshly ground black pepper
  • 1-2 tablespoon mayonnaise
  • ¼ teaspoon Worcestershire sauce
  • ¼ cup lemon juice
  • ¾ cup olive oil

Salad

  • Romaine lettuce hearts – see below notes for amount
  • 1/3 of a Baguette
  • olive oil for brushing
  • 1 clove of garlic, cut in half
  • Parmigiano Reggiano, about 2 ounces or 1/3 cup

Notes:

  • You typically will use more dressing if making individual servings. If making a full salad in a bowl, you most likely will not use all the dressing.
  • The same is true with romaine lettuce. You will need about 3-4 hearts to make about 6-8 individual servings because you will use just the smaller leaves in the center. If making a full salad in a bowl, about 2 romaine hearts will serve 3-4 people as a side salad.
  • Classic Caesar dressing is made with anchovy filets, mashed with a fork. It also does not have mayonnaise. The creaminess comes from a raw egg yolk.

Caesar salad at Amy's

Instructions:

Put all ingredients except the olive oil in a small bowl and whisk together until well combined. Drizzle the olive oil in a steady but slow stream while whisking constantly. This will help emulsify the dressing.

Alternatively, put all ingredients in a mason jar, cover with the lid and shake vigorously until all ingredients are combined.

Wash and separate the lettuce leave, using only the smaller leaves that will fit in your individual serving dish.

Slice the baguette in exaggerated bias cuts. Brush one side with a little olive oil and toast in the toaster until crunchy. Alternatively, toast them in a 375° oven for about 3-4 minutes.

Once cool enough to handle, rub the oiled side of each slice with the glove of garlic. Remember, don’t go crazy! You just need to 2-3 strokes.

To assemble your individual salads, place about 1 tablespoon of dressing on the bottom. Pick 2-3 of the best leaves for each serving dish and dip the bottom in the dressing.

Put one slice of toasted baguette in each dish, and finish with some grated or shaved Parmigiano Reggiano.

Variations:

  • As mentioned before, you can use this recipe and make a full salad in a bowl. You can still make the “croutons” the same way as described above and just crumble them into pieces in your salad
  • Add a cut piece of grilled chicken breast for each serving.

Do Ahead:

  • The dressing can be made up to 7-8 days ahead. In fact, when you are making it, why not make a double batch. That way you have fresh salad dressing all week.
  • The lettuce can be washed, and leaves separated one day ahead. To keep them crisp, loosely wrap the leaves in a damp paper towel, put in a plastic bag and keep in the fridge. Do not close the top of the bag. Give the lettuce a chance to breathe.
  • The croutons can be made up to one day ahead. If they get stale, pop them in the toaster to reheat.


Farmers Market Green & Purple Bean Salad

Green Bean Salad

It’s amazing all the beautiful produce you can find at Farmers Markets. I’m always inspired by all the colors, textures, and fragrances. Please watch the video below for a simple, refreshing, and delicious salad that was inspired by a trip to the Farmers Market recently. This is one of those recipes that will not have exact amounts so just go with it. It’ll be fine. I promise!

Serves 2 as a side dish          Difficulty Level: easy peasy

Ingredients:

  • about 2-2 1/2 cups cut beans. I used green and purple, but you can use other varieties like purple or yellow
  • about 1/4 of a small red onion, sliced thinly
  • 1 medium-ish tomato, chopped
  • 1 cup roughly chopped fresh basil
  • basic vinaigrette

Green Bean ingredients

Instructions:

Snap off or cut the flowering end of the beans. Cut into bite-sized pieces, about 1.5-2″ long. Add all the ingredients in a bowl and toss with some of the vinaigrette. See? Easy peasy!

Green Bean Salad 1

Variations:

  • Use cherry tomatoes
  • Add Thai basil for a little sweeter taste. You can also add mint, chives, or tarragon. Either instead or in addition to the basil.
  • Add chopped lettuce to add volume. With lettuce, it can serve 2 people as a meal
  • Serve with grilled chicken breast or grilled shrimp
  • Use any acid for the dressing, like lemon or lime juice, apple cider vinegar, etc.

Do Ahead:

  • The best part of this salad is that it’s fresh, so there is not a whole lot you can do ahead. But…You can cut/slice/chop the beans, tomatoes, and onions 1 day ahead. Keep them in separate bags or containers until ready to dress the salad.
  • The dressing can be made up to 1 week ahead.
  • If serving with grilled chicken, shrimp, or any other protein, you can make it one day ahead. Since it’s being served with a salad, there is no need to reheat. Serve cold or at room temperature.