Crudité Platter Upgraded!

Whether you are hosting a party or are invited to bring a dish to a gathering, it’s so easy to go the same old stuff you know or can pick up at a store. But aren’t you tired of the same old unimaginative stuff you see at all parties? Well, here is an idea! Put down that package of Knorr Vegetable Soup Mix and take something ordinary – like a crudité platter – and make it into something extraordinary that will WOW everyone. Here are some tips:

Crudite Cucumber Cups

When I make a vegetable platter, I try not to use the same old carrots, cauliflower, celery, blah, blah, blah, boring. Or if I use common vegetables, I cut them in a different shape or use individual containers to make it look more interesting. For example, instead of just slicing cucumbers into rounds, I cut them lengthwise into quarters. (This works best with smaller cucumbers like the Persian variety.)

crudite

Some of the vegetables I like to use are jicama, blanched asparagus or green beans, endives, lettuce leaves, radishes, different colored bell peppers, and sliced fennel. If I use carrots, I get the multi-colored variety and cut them lengthwise. It’s all about the ingredients you use and how it’s presented.

endives with Dip

I hope you get inspired by these photos and make your own amazingly fabulous crudité platter. And please take pictures of your creation and share them with me in the comment section below. I would love to see them.

Crudite in a cup

Now go get your creative juices flowing!

Note: For the individual cucumber crudité in the second picture, I hollowed the cucumber and put the dip on the bottom.

Variations:

The possibilities are endless. go wild!

Do Ahead:

Most vegetables can be cut/sliced one day ahead.


Summer Orzo Salad & Grilled Shrimp

A light and refreshing meal for those warm Summer nights

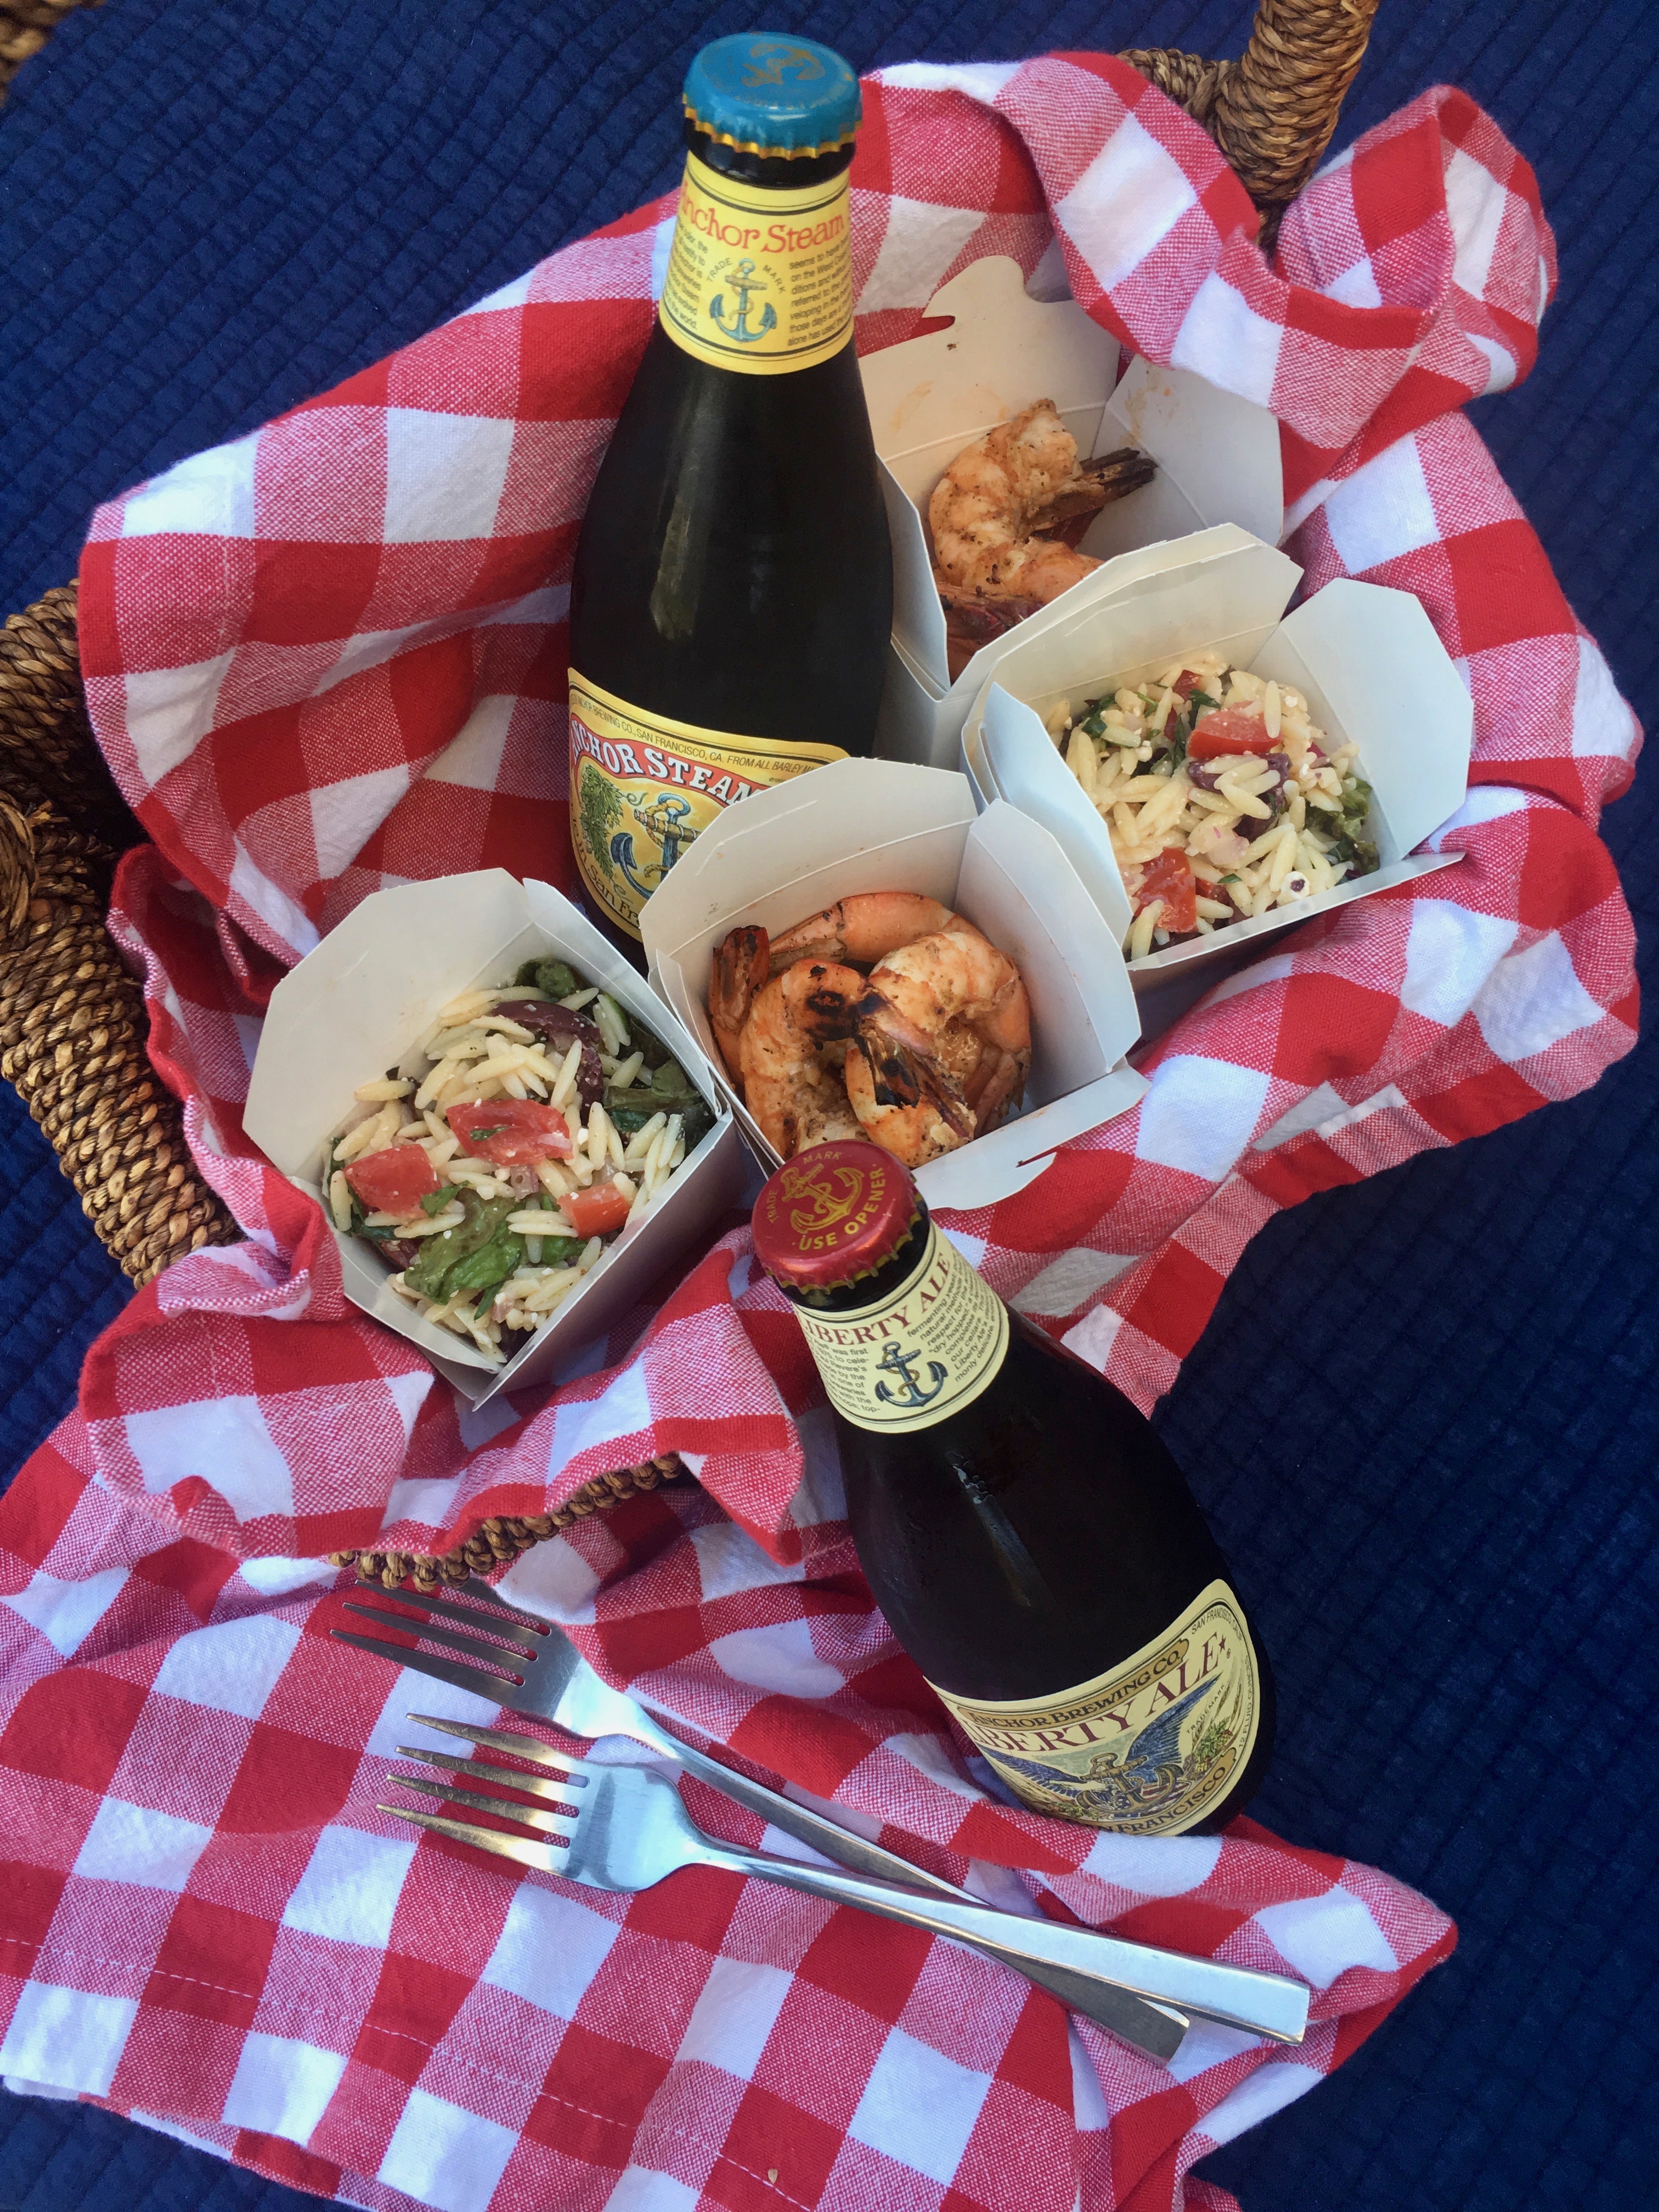
Outdoor movie night by the beach calls for this kind of picnic! And the best part? They were showing Ferris Bueller’s Day Off. IMG_0154

Summer Orzo Salad

Serves 4-6          Difficulty Level: easy peasy

IMG_0153 2

Ingredients:

  • 8 oz orzo pasta, about 2 ¼ cups
  • ½ cup Kalamata olives, sliced in quarters, lengthwise
  • 1/3 cup chopped red onions, about ½ of a small onion
  • ¼ cup chopped, fresh herbs, I used tarragon and basil
  • 1 cup chopped tomatoes
  • ¼ cup crumbled feta cheese
  • ¾ cup olive oil
  • ¼ cup red wine vinegar
  • ½ teaspoon sea salt
  • ¼ teaspoon freshly ground pepper

Instructions:

Cook the orzo in salted, boiling water until soft. When cooking pasta for a salad, I like to cook it a little longer than al dente, for a more delicate texture. Drain and set aside to cool. Click here for a video on how to properly cook pasta

Once cool, toss with the olives, red onions, fresh herbs, tomatoes, and feta.

IMG_0143

For the dressing, whisk all ingredients together. The dressing makes about 1 cup. You won’t need it all, but it’s always nice to have home-made dressing in the fridge. Dress the pasta salad so it is flavorful and glistening, but not pooling at the bottom of the bowl.

Serve at room temperature or cold.

Variations:

  • Add some shredded roasted chicken to make it a heartier meal
  • Add herbs like thyme, parsley, chives, dill, oregano, lemon thyme, or mint. Almost any herb you like, but I don’t recommend rosemary. The leaves are too tough and the flavor too overpowering for this dish.
  • Make it a roasted vegetable pasta salad!
  • Add cucumbers for a little extra crunch. Or how about some nuts?
  • Add some arugula or other lettuce

Do Ahead:

  • The dressing can be made up to 2 weeks ahead of time and kept in the refrigerator.
  • The pasta can be cooked, drained, and tossed with a little olive oil about 2 days ahead and kept refrigerated.
  • The finished salad can be refrigerated up to 4 days. It will even taste better as it sits.
  • Everything but the herbs that need to be chopped, can be chopped one day ahead and kept in separate containers or sealed bags.
  • Anybody know why you shouldn’t chop herbs ahead of time?


Grilled Shrimp

Serves  4-6          Difficulty level: easy-medium

Appetizers

Ingredients:

  • 1 pound large shrimp
  • 1-2 cloves of garlic, minced
  • 1/2 teaspoon ground, cayenne pepper
  • 1/4 teaspoon paprika
  • 1/2 teaspoon sea salt
  • 1/4 teaspoon freshly ground black pepper
  • 2 tablespoons lime juice
  • 2-3 tablespoons olive oil
  • 1-2 limes and/or a few sprigs of cilantro for garnish (optional)

Instructions:

Take the shells off the shrimp, leaving the tail on.

Toss the shrimp with the rest of the ingredients until well coated. Let it sit for 1/2 hour to 1 hour at room temperature. Letting it sit in the marinade longer than one hour will start to break apart the proteins in the shrimp and will make it mushy. Not a fun texture to eat!

IMG_0145

While waiting for the shrimp to soak up all the great flavors of the marinade, turn on your grill to medium-high.

When ready, place the shrimp on the grill and cook for about 1-2 minutes on each side, depending on the size of the shrimp, or as soon as it turns pink. You will notice in the picture I have below that some are still a little gray. If I left it on the heat until that whole side of shrimp was pink before I flipped it, it would have been overcooked. I relied on the residual heat while cooking the flip side to cook them through.

IMG_0148

Take the shrimp off the grill and place on a plate. Cover loosely with aluminum foil and let sit for about 3-5 minutes. This is called “resting”.

Garnish with lime wedges. Serve warm or at room temperature.

Variations:

  • Add different spices like cumin
  • Make a seafood mixture with shrimp and scallops or lobster
  • Serve them on skewers

Do Ahead:

  • Hmmmm…sorry, no luck guys here for this recipe. It can sit at room temperature for 1-1.5 hours after it’s grilled.


For the picnic, I put the salad and shrimp in Chinese Takeout boxes for easy transportation and eating. And it looked pretty cool too.

And if you can enjoy this meal while on the beach, sipping some wine, and watching this movie, then all the better! I recommend it.


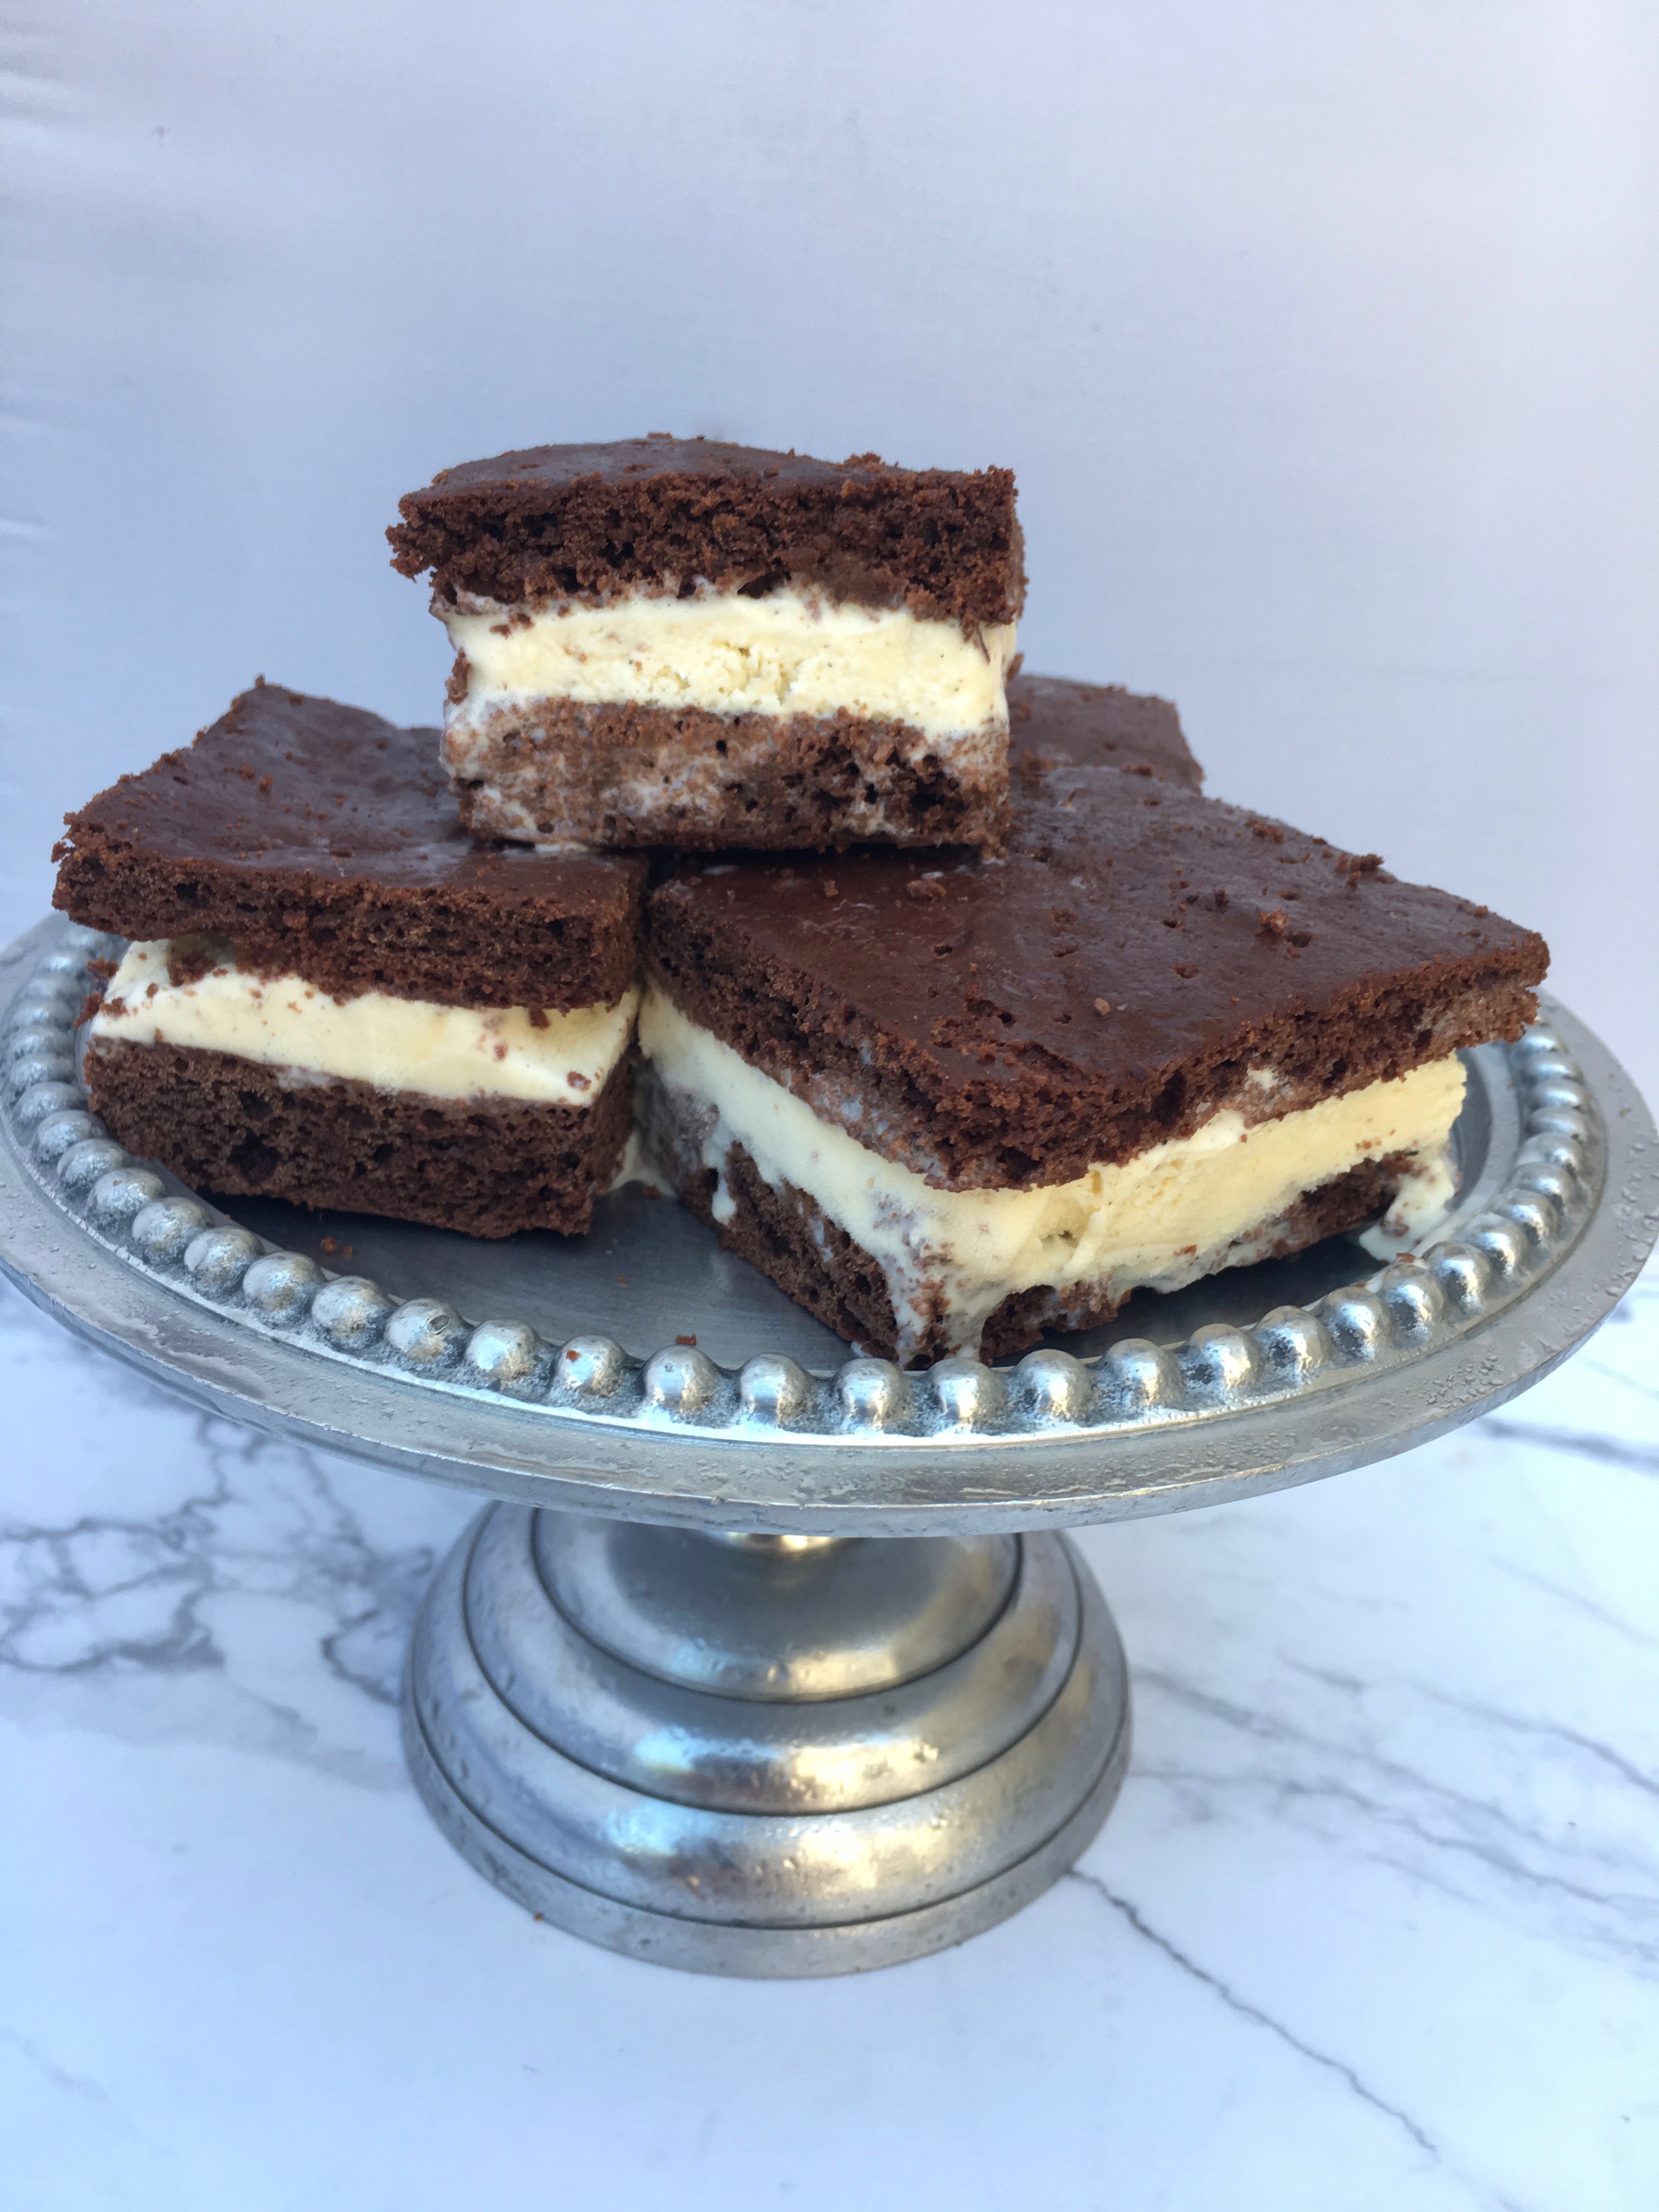
Ice Cream Sandwiches

Makes 12 ice cream sandwiches


Vanilla Ice Cream

  • 2 cups whole milk
  • 1/3 cup granulated sugar
  • 2 tablespoons golden syrup or light agave nectar*
  • 2 tablespoons tapioca starch*
  • 1/4 teaspoon kosher salt*
  • 1 cup heavy cream
  • 1/2 teaspoon vanilla extract

Chocolate Cookie Bars

  • 1 1/4 cup King Arthur Unbleached All-Purpose Flour
  • 1/2 cup Dutch-process cocoa powder or all-purpose baking cocoa
  • 1/2 teaspoon baking soda
  • 1/2 teaspoon kosher salt or 3/8 teaspoon table salt
  • 6 tablespoons unsalted butter, softened
  • 1/2 cup granulated sugar
  • 1/4 cup light brown sugar
  • 1 teaspoon vanilla extract
  • 2/3 cup whole milk

To make the ice cream: Whisk together 1/2 cup of the milk, the sugar, syrup, tapioca starch, and salt in a saucepan. Stir in the remaining milk, and the cream.

Cook and stir the mixture over medium-high heat until bubbles form around the edge and it begins to steam. Simmer for 3 to 5 minutes, stirring constantly, until the mixture thickens to the consistency of a cream sauce; don’t let it boil.

Remove the mixture from the heat, stir in the vanilla, and chill thoroughly in the refrigerator. For best results, the mixture should be very cold. Make it ahead and refrigerate overnight or for up to a couple of days, if desired. When the mixture is thoroughly chilled, freeze it in your ice cream maker, following the manufacturer’s directions. Store in your refrigerator’s freezer until you’re ready to make the sandwiches.

Preheat the oven to 350°F, with a rack in the center. Lightly grease a piece of parchment about 12″ x 16″, and place it on a flat work surface.

To make the cookies: Whisk together the flour, cocoa, baking soda, and salt; set aside.

In a separate bowl, beat together the butter, sugars, and vanilla at high speed until well combined and somewhat expanded; the mixture will look a bit grainy, but also fairly creamy.

On low speed, add half the dry ingredients; then the milk; then the remaining dry ingredients, scraping the bowl between additions.

Dollop the batter all over the prepared parchment paper. Use a spatula to spread it to the edges of the parchment, smoothing it as flat as possible. Pick the parchment up, and set it into a half-sheet pan (18″ x 13″), or onto a large cookie sheet.

Bake the cookie slab for about 10 minutes, until it just loses its shine. Remove the pan from the oven, and cool the cookie on the pan for about 5 minutes. Cut it in half crosswise to make two rectangles, each about 8″ x 12″. Trim the edges of each rectangle, if desired; you’ll make neater-looking sandwiches.

Use a fork to prick the top of the cookie slabs in neat rows, like the top of a traditional ice cream sandwich. Place the cookie slabs, with their parchment, on a rack or racks to cool completely. When completely cool, wrap well and place in the freezer. If there’s room, freeze them on a baking sheet; it’s good to have a cold surface to work on when you’re making the sandwiches.

To assemble the ice cream sandwiches: Peel the parchment off the backs of the cookie slabs. Place one slab, bottom up, on a cold surface. Spread with ice cream. Top with the second cookie slab, top side up. Press down firmly to distribute the ice cream evenly between the cookie slabs.

Use a sharp knife to trim the edges of the sandwiches, if necessary or desired. If the ice cream has started to melt, place the pan back in the freezer to firm it up. Once it’s firm, cut the slab into 12 squares.

Serve immediately; or wrap squares individually in plastic wrap, and store in the freezer.

IMG_0354

I have to say that I cheated a little and bought the ice cream.

Recipe courtesy of King Arther Four